Seal the gap between a coop and run by bridging each fixed opening with hardware cloth or solid metal, overlapping both structures and clamping the edges to sound framing. Continue the barrier across the roof junction, around the hen doorway and through the shared ground line. Fit a secure night door, and keep ventilation open but screened. Hardware cloth in the 1/4- to 1/2-inch range is recommended by Utah State University Extension, but those openings do not provide identical exclusion against small animals [1].
The repair must close the route around the patch as well as the visible hole. Loose overlaps, an uncovered tunnel floor or an apron that stops at the coop corner can leave another entrance beside the repair.
| What to check | Planning guidance | Important limit |
|---|---|---|
| Unintended openings | Mice can enter holes about 1/4 inch across, roughly pencil width [2]. | Use that size as a warning to repair, not an acceptable leftover gap. |
| Small predators | Poultry Extension reports least weasels passing through holes as small as 1/4 inch [3]. | A mesh label alone is not proof that the enclosure excludes them. |
| Fixed-joint mesh | USU recommends tightly woven 1/4- to 1/2-inch hardware cloth rather than chicken wire [1]. | Confirm the actual clear opening, wire strength and attachment; do not treat 1/2 inch as mouse-proof. |
| Buried ground barrier | Virginia Cooperative Extension describes wire buried at least 12 inches deep with an outward toe of about 6 inches [4]. | Continue the detail across the junction; this is guidance, not a universal building-code requirement. |
| Surface-apron alternative | NC State Extension describes wire bent outward at least 12 inches across the soil and secured with deep landscape staples [5]. | Keep the apron connected to the upright barrier, including at corners. |
Where Should You Look for Gaps Between the Coop and Run?
Inspect the connection from both sides before buying materials. Trace the whole boundary rather than checking only the largest opening.
- Sides: follow the run posts against the coop wall, including corners, siding grooves and spaces behind trim.
- Top: check where the run roof or cover meets the coop wall and eaves.
- Hen doorway: inspect the passage frame, door tracks, threshold and closed-door edges.
- Ground: look under the sill and around both corners for dips, loose mesh and digging.
Measure each opening and identify sound framing on both sides for the fixings. Photograph awkward corners with a ruler in view so you can plan the patch without guessing. If a post moves or the wall material is rotten, repair the support before attaching a strip.
A predator does not always need to enter completely to injure a bird. Poultry Extension notes that raccoons can pull a chicken’s head through enclosure wire [3]. Check exposed mesh near places where birds rest as well as the coop-to-run seam.
What Materials Should You Use to Seal the Gap?
Use a mechanically fastened barrier for predator exclusion. CDC rodent-exclusion guidance lists hardware cloth, metal, cement and similar durable materials for larger holes; it describes steel wool held with caulk for small holes [2]. Weather sealant may help with rain after the barrier is secure, but it should not be the only thing holding a joint closed.
USU explains that predators can tear chicken wire, rats can bite through its thin wire and smaller rodents can pass through its openings. Its alternative is tightly woven hardware cloth in the 1/4- to 1/2-inch range [1]. Because CDC identifies mouse entry at about 1/4 inch, do not assume a 1/2-inch opening excludes mice [2]. For a small-animal problem, confirm the exclusion detail with your local Extension office rather than relying on a generic predator-proof label.
Materials to prepare
- Hardware cloth selected for the animals you need to exclude.
- Solid sheet metal or flashing for appropriate fixed seams.
- Timber battens or metal clamping strips, with screws and broad washers suited to the supporting material.
- Compatible frame clamps or clips for a metal run, plus connected ground-barrier material.
- A tape measure, cutting tools and protection for your hands and eyes.
Check both opening size and wire thickness. The Haisen hardware-cloth listing covers several specifications; a catalogue range is not a predator-resistance rating. Confirm the exact opening, wire diameter, coating and roll dimensions before ordering.
Fold, hem or cap cut edges so birds and people cannot contact projecting wire. Virginia Cooperative Extension advises removing loose wire ends, stray nails and other sharp scraps from poultry housing [4].
How Do You Fasten a Patch Across the Side Gap?
Support the patch on both structures. Attaching one edge firmly while leaving the other tied loosely to mesh leaves a flap rather than a closed junction.
- Stabilize the supports. Check the coop framing and run connections. Follow the enclosure manufacturer’s instructions for tightening or repairing the frame.
- Measure the full opening. Allow enough material to reach sound supports on every edge. Set the overlap and fixing layout to suit the actual frame; there is no single spacing that fits every wall, mesh and fastener.
- Clamp the edges. Sandwich the mesh under battens or metal strips fixed into framing, not just thin siding. Flashing can cover a seam, but thin flashing alone is not a substitute for a sound fixing substrate.
- Close the corners. Fold a continuous piece around a corner where practical, or secure overlapping pieces so neither edge can peel back.
- Check the attachment. Gently pull beside each clamped edge and press at the corners. Repair any edge that lifts or exposes a route behind it. Some flex in the middle of mesh is normal; a drum-tight panel is not the acceptance test.
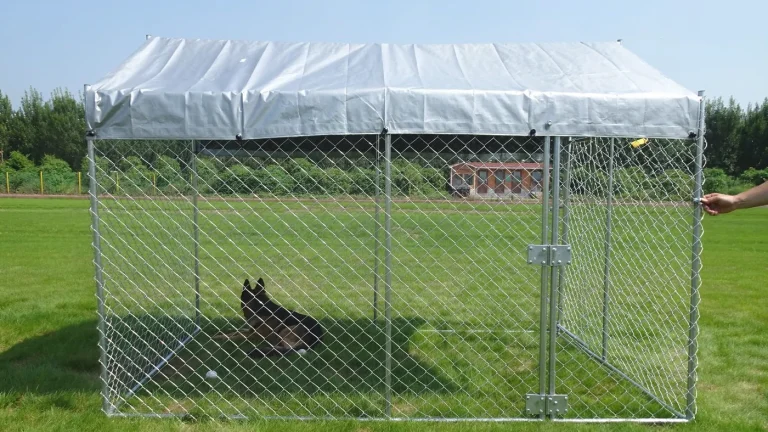
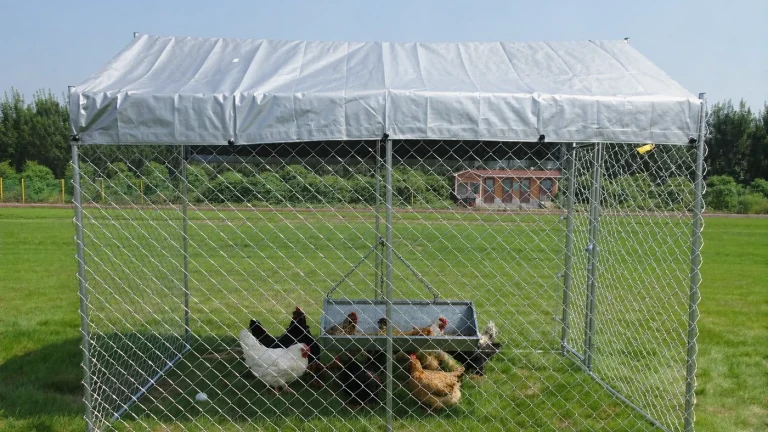
Where a walk-in metal chicken run meets a timber coop, use connections suited to each material. The galvanized frame, mesh and lockable door described for a flat-roof run do not establish how it should attach to a separate building. Confirm compatible clamps and any drilling restrictions with the manufacturer.
Keep the seam repair separate from structural support. Do not use mesh or flashing to carry the run roof, replace missing anchors or brace an unstable frame. Confirm the connection and anchoring for the actual enclosure and local conditions before adding attachments.
How Do You Close the Roof Junction Without Blocking Ventilation?
The top joint needs two checks: can an animal get through, and can rain drain away? Mesh can close an access route while allowing airflow, but it does not waterproof the joint. Flashing can direct water, but it must fit the wall and roof detail.
- Continue the animal barrier along the full junction, including the ends beneath the eaves.
- Where weather protection is needed, use compatible flashing integrated with the existing wall and roof so water drains outward rather than behind the siding.
- Keep planned coop vents open and securely screened. Virginia Cooperative Extension calls for dry, draft-free housing with ventilation and identifies dampness and ammonia odor as warning signs of inadequate airflow [4].
- Secure canopy edges according to the manufacturer’s instructions rather than cutting away attachment points or pulling a cover against sharp metal.
Oklahoma State Extension recommends covering the run to exclude birds of prey and climbing predators [6]. Do not confuse a rain canopy or an open overhead string grid with a complete small-animal barrier.
After the next rain, look beneath the junction for wet bedding or drips and inspect the flashing ends for routes behind the repair. A visually straight strip alone does not prove that the joint is sealed.
How Do You Seal Around the Hen Door and Connecting Tunnel?
Keep the intended passage open for the birds while closing unintended routes around it. Check the door in both its fully open and fully closed positions.
- Build a sound passage with protected sides, a roof and a firm, smooth floor or threshold. Keep cut wire and exposed fixings away from feet and feathers.
- Carry the barrier underneath an earth-floor passage, or use a suitable solid floor, so the tunnel does not bypass the ground protection.
- Provide enough clearance for the birds using it. Do not shrink the doorway so far that birds struggle to pass.
- Make sure the solid night door closes fully and secures without trapping bedding in its tracks or sill.
- With the door closed, shine a flashlight from one side and inspect the other for unintended edge gaps. Check the corners and bottom physically too; a light check is not proof of predator resistance.
Virginia Cooperative Extension advises locking poultry inside secure housing before dark when the outside run is not predator-proof [4]. Sealing the connector does not make an otherwise open run secure overnight.
How Do You Continue the Ground Barrier Across the Junction?
Connect the coop-side barrier to the run-side barrier instead of ending each at its own corner. Choose a ground detail suitable for the site, and keep it continuous beneath the connecting passage.
- Buried wire with an outward toe: Virginia Cooperative Extension describes at least 12 inches of burial with about 6 inches turned outward [4].
- Surface apron: NC State Extension describes wire extending outward at least 12 inches across the soil and held with deep landscape staples [5]. Secure overlaps and corners so an animal cannot lift a free edge.
These are different published approaches, not instructions to combine every dimension. Soil, drainage, existing foundations and the animals present affect the choice. Do not excavate beneath supports or weaken footings to fit a generic trench detail; obtain site-specific advice where that is a risk.
Before covering the mesh, photograph its connection, overlaps and corners with a tape measure visible. Check that the barrier continues behind posts and beneath the threshold. After backfilling or pinning the apron, revisit the side seams and door fit in case the work moved either structure.
Keep spilled feed and hiding places away from the connection. USU recommends rodent-proof feed storage and protecting the bottom as well as the sides and top of the enclosure [1].
Which Gap-Sealing Shortcuts Should You Avoid?
| Shortcut | What to do instead |
|---|---|
| Foam or caulk as the only barrier | Install a durable, mechanically secured exclusion layer; use compatible weather sealant only where needed. |
| Chicken wire over the junction | Select hardware cloth or solid material appropriate to the target animal. |
| A mesh flap held down with bricks | Attach wall patches to sound supports and secure ground aprons against lifting. |
| Blocking vents to remove every trace of light | Distinguish unintended cracks from designed openings; retain screened ventilation. |
| Repairing the visible side but ignoring the ends | Trace the barrier around the roof, corners, doorway and ground line. |
How Do You Check That the Repair Stays Closed?
Save the measurements and photos from the repair as a baseline. After storms, ground movement or door problems, compare the same corners and edges rather than relying on a quick glance from outside.
- Gently check clamped edges for lifting, loose fasteners and damaged mesh.
- Clear the door tracks and threshold, then confirm the door closes and secures.
- Inspect the ground line for settling, raised apron edges and fresh digging.
- Check for new sharp edges, wet bedding and obstructed vents.
The finished connection should have a securely attached barrier across both structures, a protected passage with a working night door, and continuous ground protection. No unintended pencil-width opening should be accepted simply because the rest looks tidy. These checks help you find defects; they are not a tested predator-proof certification.
Plan your coop-to-run connection
Send your wall material, run model, gap measurements and photos with your inquiry. Ask Haisen to confirm available mesh specifications and compatible connection options before ordering.