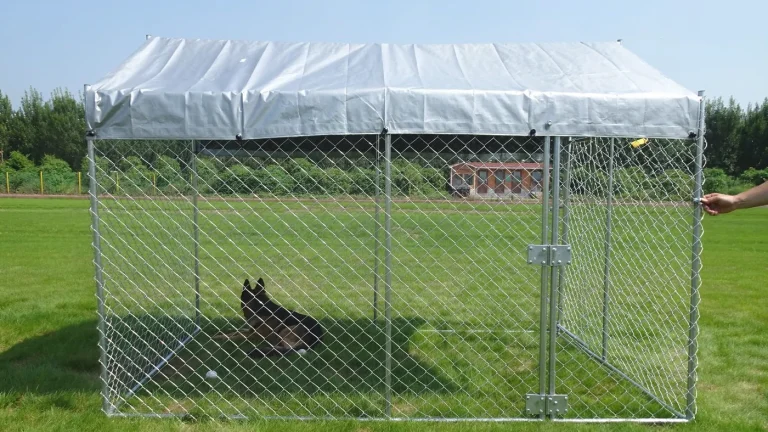
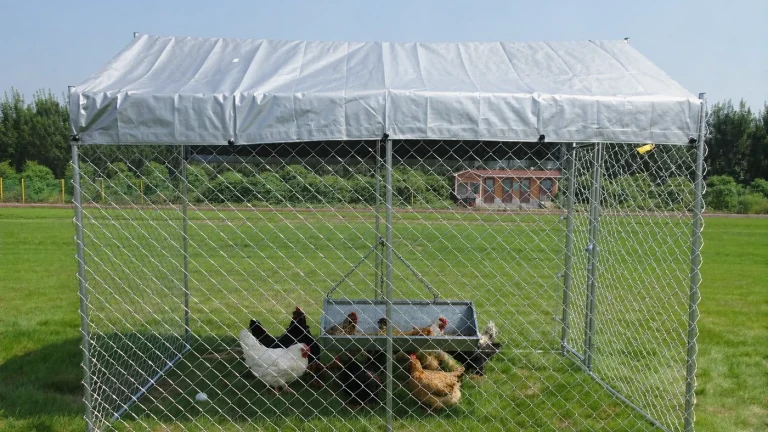
Inspect a metal chicken run sample by assembling the exact model you plan to order, comparing its dimensions and components with the agreed drawing, and checking the door, roof fit and fixings. Record measurements, defects and photos before deciding whether to approve it, request corrections or reject it as the reference for bulk production.
It covers one pre-order unit, not lot inspection. For lots, sizes and pass-or-fail counts come from the agreed sampling plan. 2859 1
What One Sample Proves
On this one sample, verify: actual sizes against the drawing, tube profile with wall thickness taken at an open end, mesh opening plus wire diameter as the smallest and largest of several readings, the finish around welds and cut ends, how the door and latch feel after repeated use, whether the roof sits right, if the parts count matches the packing list, and how long the build takes with hand tools.
Still, one sample has hard limits. Later units can differ, and no single build proves snow or wind strength, rust life, predator-proofing, or hen capacity. Bird numbers stay rough math: eXtension suggests 3 to 4 sq ft inside and 10 sq ft outside per laying hen, while noting thin peer-reviewed work on backyard flocks. Space allowances in housing for small and backyard poultry flocks
This is an inspection procedure, not a report of a tested Haisen sample. Keep completed measurements and observations with the sample ID and drawing revision so approval rests on evidence from the actual unit.
Documents and Tools
Before the box arrives, get the specification, dated dimensioned drawing, parts list, manual and packing list. Confirm the exact model: the walk-in chicken coop range includes several lengths and roof shapes. Agree measurement tolerances and acceptance criteria before inspecting, rather than choosing limits after seeing the sample.
Prepare a steel tape, caliper or micrometer, camera, notepad and the assembly tools listed in the manual. Photograph the sealed box and each layer as you unpack, then check parts against the list. Keep consistent photo positions for the full frame, door and corners. Mark missing tolerances, steel specifications, coating details or reports as unresolved; a “heavy duty” label is not a measurable specification.
Dimensions and Usable Area
On the sample, log outside length, width and height, door opening width and height, plus inside floor size, with the deviation for each instead of a plain pass. Usable ground is inside length times width less the in-run shelter, feeders, drinkers, posts and dead corners hens cannot use.
Haisen lists the sharp-roof 6.4 ft walk-in coop at 6.4 by 9.8 ft, the first row below. A night shelter needs its own check — Virginia Extension looks for at least one nest per four to five females. APSC 186.pdf
When you check the sample floor, name the math you use. eXtension works on 10 sq ft outside per hen, while the Maryland table (Clauer, 2009) works on 8 for layers and 10 for large birds. Space allowances in housing for small and backyard poultry flocks Housing requirements For the 9.8-ft-wide sharp- and dome-roof sizes (shop page checked 12 November 2026; flat-roof runs are listed at 6.5 and 13 ft long), gross and rounded down, that gives:
| Listed size (length by width) | Gross footprint | Gross-area calculation at 10 sq ft per hen | Gross-area calculation at 8 sq ft per hen |
|---|---|---|---|
| 6.4 by 9.8 ft | 62.72 sq ft | About 6 hens | About 7 hens |
| 12.8 by 9.8 ft | 125.44 sq ft | About 12 hens | About 15 hens |
| 19.2 by 9.8 ft | 188.16 sq ft | About 18 hens | About 23 hens |
These are gross-area calculations, not recommended flock sizes. Recalculate using measured usable area after deductions: six laying hens at the 10-sq-ft baseline require at least 60 sq ft usable. For example, if deductions leave 56 sq ft, rounding 56 ÷ 10 down gives five, not six. This is a hypothetical planning example, not a sample measurement or welfare guarantee.
Frame and Fasteners
Compare tube profile, outside dimensions and wall thickness with the drawing. Measure at an accessible open end without cutting or damaging the sample; note whether the reading includes coating. If no suitable edge is accessible, request a documented measurement method rather than guessing. After assembly and fastening as instructed, gently check for movement at joints and corners without climbing on or load-testing the frame. Movement calls for investigation; it does not by itself identify thin walls or prove inadequate strength.
Check each sample joint, bracket, and base plate:
- bolts seat in clean holes without force, threads turn freely and sizes follow the drawing;
- spares tally with the parts list;
- anchors or feet match the stated size, quantity and fixing method; separately confirm whether a digging barrier or apron is included or must be ordered.
Anchor suitability depends on the installation surface and site conditions. Trial fitting confirms compatibility, not pull-out resistance or wind capacity. Request the specified anchoring arrangement and supporting design information for the intended site; do not infer a load rating from a hand check. If ground or size needs a change, request a revised drawing through a custom coop inquiry.
Mesh Opening and Wire Diameter
Measure clear mesh openings between the wires, not center-to-center spacing, and measure wire diameter separately. Take readings at several locations and record the smallest and largest values. Note whether wire diameter includes zinc or another coating so it can be compared with the same basis in the order. Inspect for sharp edges and unsecured gaps at corners, the door and roof-to-wall joints.
Cornell advises hardware cloth with openings no larger than 1 by 1 in for poultry enclosures, noting that poultry netting alone is easily torn or dug under. Submission.php?crumb=livestock%7C10&id=1539 Maryland specifies 1/2-in hardware cloth over windows to exclude wild birds, rodents and other pests. Housing requirements These are not universal predator-proof specifications: eXtension notes that least weasels can squeeze through openings as small as 1/4 in and that raccoons can pull a bird’s head through enclosure wires. Predator management for small and backyard poultry flocks The corresponding dimensions are 25.4, 12.7 and 6.35 mm, using the exact definition of 1 in as 25.4 mm. Si units length Compare the welded wire mesh options with the opening and wire requirements agreed for the intended site.
Coating, Welds, and Cut Ends
Inspect welds and cut ends closely, and confirm when galvanizing or coating occurs in the manufacturing process. ASTM A390 covers specified styles of zinc-coated poultry fence fabric; its scope alone does not establish that a particular mesh or complete run complies. If the supplier claims compliance, request a report identifying the product, applicable edition, requirements and results. A390.htm For batch-galvanized fabricated steel parts, ISO 1461 sets out coating properties and test methods, while excluding continuously galvanized sheet, wire and mesh, automatic-plant tube and pipe, and products covered by specific standards. 81435
Record exposed steel, flaking, heavy spatter, sharp cut edges and rust at joints. Check weld locations and continuity against the drawing; visual inspection does not establish weld strength. A cloth wipe may help document loose residue, but it does not measure zinc coverage or corrosion resistance. Compare the specified coating mass or thickness with an appropriate method-stated report, rather than accepting shine as evidence of durability.
Door, Roof, and Ground Edge
Carry a bucket through the doorway, then open, close and latch the door repeatedly. Record the number of cycles and any sag, sticking or failure to engage. Check clearances at the sill, jambs and hinges, and photograph gaps with a scale. Confirm that any specified secondary lock fits and works; an easy-to-operate latch is not evidence of predator resistance.
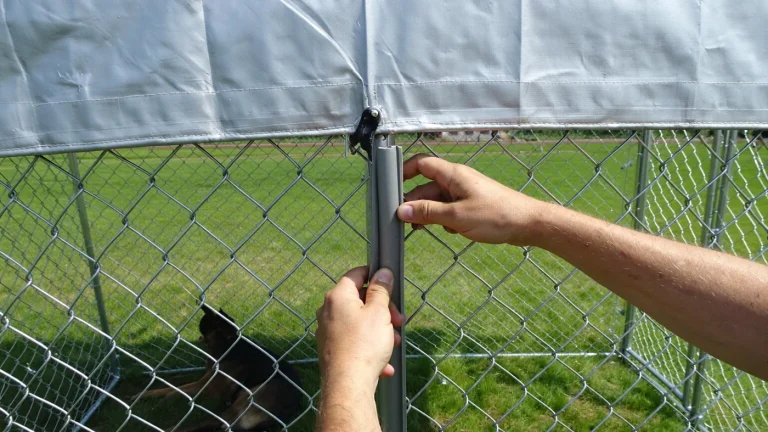
Fit the roof cover according to the instructions. Check coverage, drainage slope and attachments for sagging, rubbing or tearing. If a drainage check is agreed, record its conditions and outcome; do not treat a dry fit as a waterproofness test. For digging predators, eXtension advises burying hardware cloth at least 12 in deep. Predator management for small and backyard poultry flocks If an apron is proposed instead, request its installation detail rather than treating any loose skirt as equivalent. Neither a digging barrier nor a roof cover establishes wind or snow capacity.
Assembly, Packing, and Decision
Assemble the sample using the manual, supplied parts, specified tools and required number of people. Record elapsed time and crew size separately. If holes do not align, stop and photograph the joint before filing, drilling or forcing it; modifications would obscure the as-delivered condition. Log unclear steps, missing parts and extra work without assuming that one trial predicts every future build.
Check accessible mesh fixings, roof attachments and the closed door for looseness without applying destructive loads. If disassembly and repacking are part of the purchase requirement, agree the procedure first, then record any bent clamps, damaged coating or alignment changes during the second fit.
Packing counts as quality. Weigh and measure the carton or crate, count sets per pack against the list, confirm caps on tube ends, covers on mesh edges, sealed and marked small bags, and dry protection inside. The 12.8 ft dome-roof listing specifies two-person assembly with instructions and hardware and one set per carton, so check the sample’s manual and pack count against the same two points. In the notes hold transit bruises separate from factory faults.
Use one form for this sample inspection across suppliers:
| Item | Drawing value and tolerance | As measured | Deviation | Photo no. |
|---|---|---|---|---|
| Outside length, width, height | ||||
| Clear door opening, width and height | ||||
| Tube wall thickness | ||||
| Mesh opening and wire diameter | ||||
| Carton weight and dimensions |
Record each reading with its unit, measurement location, agreed tolerance and photo number. Photograph the whole part for context, then the defect with the tape or caliper visible. Separate observed facts from suspected causes: “door catches at the lower corner” is more useful than an unverified diagnosis of a bent frame.
Approve only when the agreed requirements are met. If corrections are needed, list each one, request a revised drawing or replacement part, and hold final approval until it has been checked. Reject unresolved safety defects or material departures from the specification. Confirm the decision in writing and retain the identified reference sample with its drawing, parts list, measurements and photos. Approving that sample does not replace inspection of the production lot.
Ordering a run in this size range?
Send the model, drawing revision, measured deviations and defect photos with your inquiry, and request written confirmation of the proposed configuration and corrections.